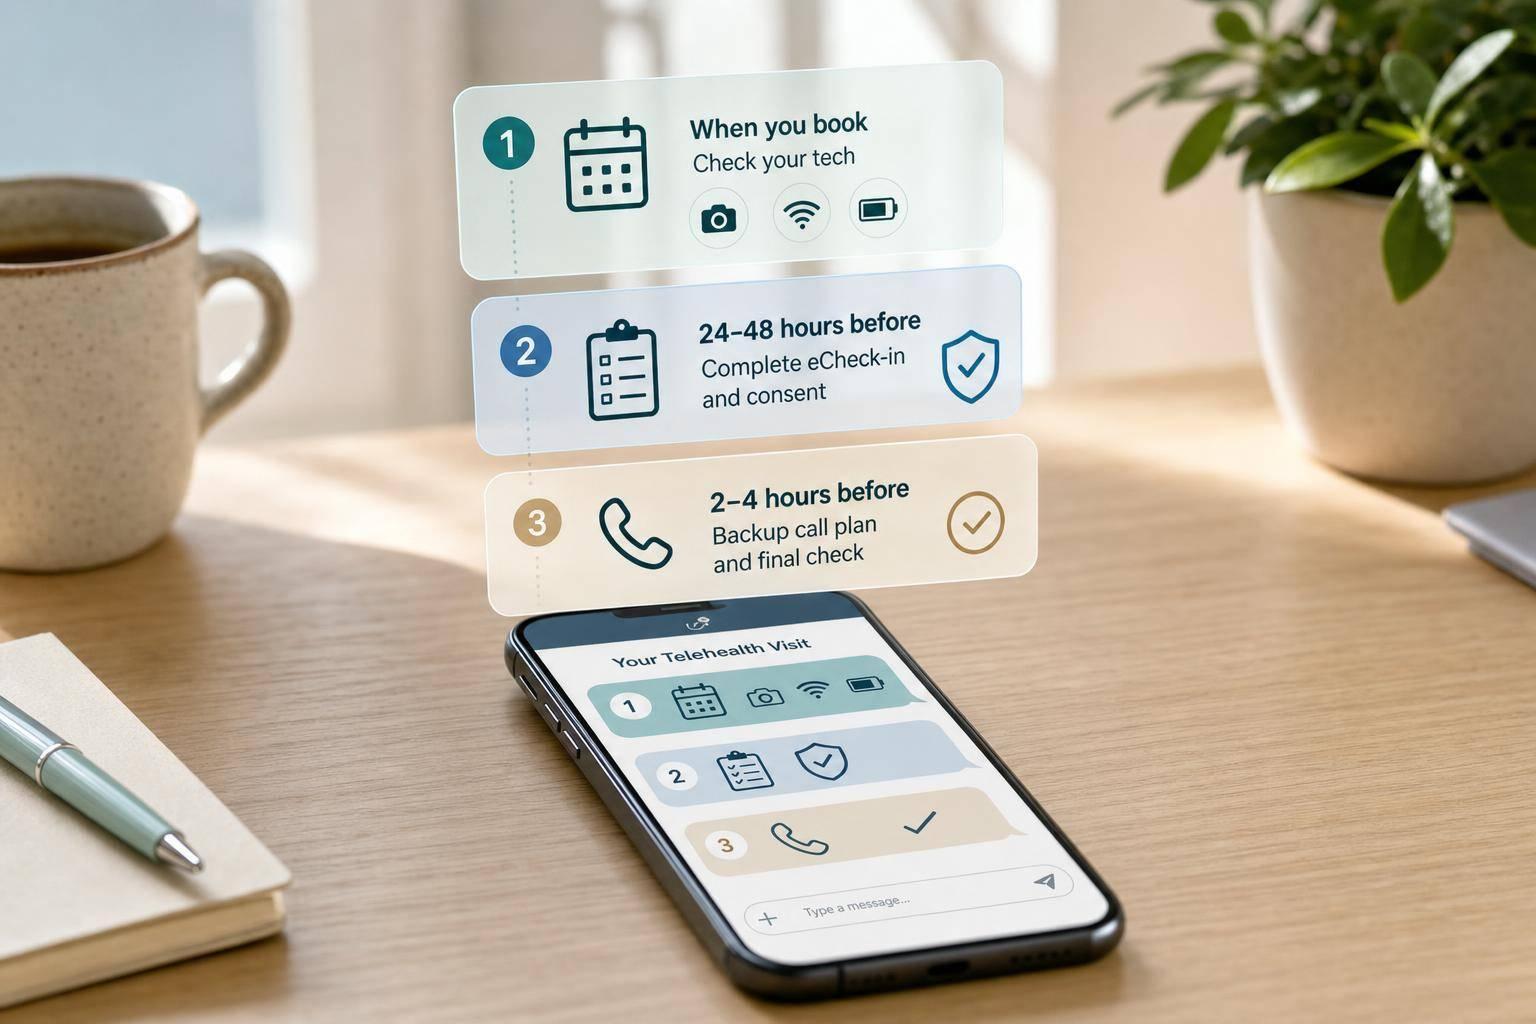
A telemedicine visit can fail before it starts, and tech trouble shows up in 19% to 37% of video visits. If I want fewer failed connections, fewer reschedules, and less patient frustration, I need to send three short pre-visit messages: one at booking, one 24–48 hours before, and one 2–4 hours before the visit.
Here’s the short version:
- I confirm the date, time, time zone, clinician name, and join method when the visit is booked.
- I send a simple tech checklist 24–48 hours before the visit.
- I remind patients to charge their device, join 5–10 minutes early, and keep a backup phone nearby on the day of the visit.
- I include brief telehealth consent wording and confirm the call-back number in case video fails.
- I keep every message short, plain, and easy to scan.
That matters because reminder systems can cut missed visits. In one review, automated text reminders lowered non-attendance by 28.9%, and live phone reminders lowered no-shows by 39.1%. And when patients hit tech problems, their odds of being satisfied drop hard.
If I had to sum up the whole article in one line, it would be this: send the right message at the right time, give patients one short checklist, and make the backup plan clear.
Patient Tips for a Successful Telemedicine Visit
sbb-itb-7164bd9
Send Pre-Visit Messages at Three Key Times
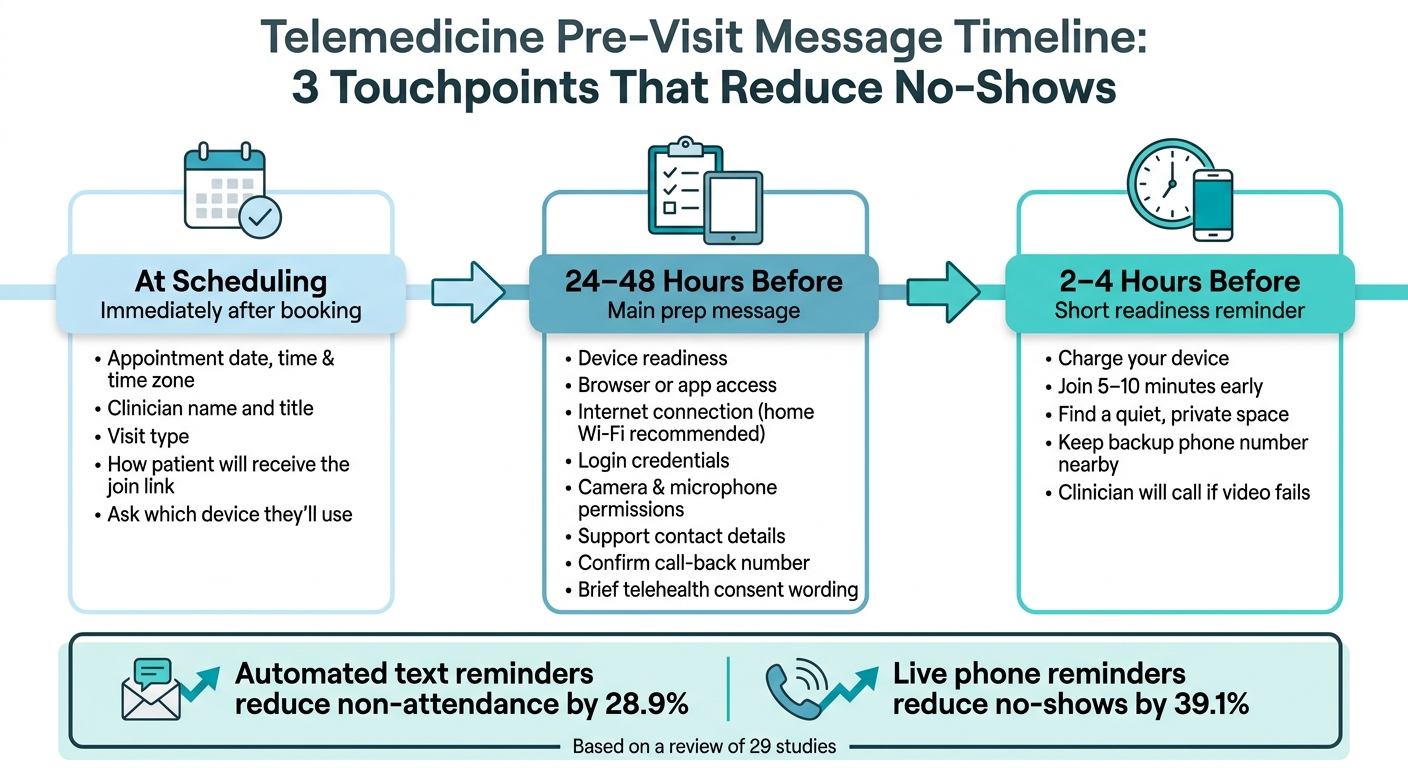
Telemedicine Pre-Visit Message Timeline: 3 Touchpoints That Reduce No-Shows
One reminder is often not enough. Sending three works better.
Across 29 studies, automated text reminders cut non-attendance by a weighted mean of 28.9%, while live phone reminders cut no-shows by 39.1%. A simple setup is to send reminders at booking, 24–48 hours before, and 2–4 hours before.
| Message Timing | Primary Purpose |
|---|---|
| At Scheduling | Confirm the date, time with time zone, clinician name and title, visit type, and how they'll receive the link. |
| 24–48 Hours Before | Send the full tech checklist: device, browser or app, internet connection, login credentials, and permission checks. |
| 2–4 Hours Before | Send a short readiness reminder about charging the device, joining early, and having a backup phone number ready. |
These three touchpoints give you the structure for the message template itself.
At Scheduling: Confirm the Visit and How the Patient Will Join
Send a written confirmation right after the appointment is booked. Include the appointment date and time in U.S. format, along with the time zone, the clinician's name and title, the visit type, and how the patient will get the link - by text, email, or portal alert. If the portal shows a Join Visit button, say that here too.
It also helps to ask which device the patient plans to use: smartphone, tablet, laptop, or desktop. Save that detail. Then your next reminder can point them to the right browser or app for the device they’ll use.
24–48 Hours Before: Send the Full Tech Checklist
This is the main prep message. The 24–48 hour window gives patients time to fix common issues before the visit, like a missing app download, an old browser, a forgotten password, or blocked permissions.
Cover the basics in plain language: device readiness, browser or app access, internet connection, login credentials, camera and microphone permissions, and support contact details. Tell patients to use the browser or app your practice supports and to allow camera and microphone access if prompted. For internet access, direct them to use home Wi‑Fi or a wired connection instead of public internet.
Add a clear support line so patients know exactly who to contact if they can't sign in or if something stops working.
2–4 Hours Before: Confirm the Patient Is Ready to Join
The day-of message should be short and direct. Tell the patient to charge the device, join early, and keep a backup phone number nearby. Ask them to find a quiet, private place and join 5–10 minutes early. Federal guidance recommends that patients sign on early so any issues can be addressed before the scheduled start time.
End with a simple backup plan: let the patient know the clinician will call the confirmed phone number if video fails. That one line lowers stress and gives the patient a clear next step.
Next, turn this workflow into a short patient checklist.
Build a Short Tech-Check Message Patients Can Follow
Use the 24–48-hour reminder to send a short tech-check note patients can act on fast. Keep it to about a minute and focus on the three issues that cause most video visit problems: power, internet, and device permissions.
Here’s a patient-facing version you can send:
Please get ready for your video visit by checking a few things before your appointment. Charge your device and keep it plugged in during the visit. Move closer to your Wi‑Fi router, and pause streaming, gaming, or large downloads during the call. If you hear echo, use headphones.
Open the visit link in Chrome, Edge, or Safari. If your browser asks to update, please do that first. When you tap the link, select "Allow" for camera and microphone access.
If something doesn’t work, try one fix, then try the link again one time. If the visit link won’t open, close and reopen the browser, then tap the link again. If the screen is black or you can’t see the clinician, tap "Allow" for the camera and rejoin. If the clinician can’t hear you, make sure your microphone is not muted, then rejoin. If the call freezes or drops, move closer to the Wi‑Fi router and stop streaming.
If it still doesn’t work after one retry, please stop troubleshooting and call us at [clinic number]. We may switch to your backup number: [backup number]. By joining this telehealth visit, you consent to receive care by video if a private space is not available or if minor technical issues occur.
The one-fix rule matters here. If patients keep trying five different things in a row, they often get more stuck, not less.
| Problem | One-step fix | Stop troubleshooting if... |
|---|---|---|
| Can't open the visit link | Close and reopen the browser, tap the link again | Still won't open after 2 tries |
| Black screen or can't see the clinician | Tap "Allow" for camera, then rejoin | Video is still black after rejoining once |
| Clinician can't hear you | Check that the microphone is not muted, then rejoin | Sound still fails after 1 rejoin |
| Call freezes or drops | Move closer to the Wi‑Fi router, stop streaming | Call drops more than twice |
After the tech check, add brief telehealth consent language and the patient's backup number.
Add Consent Language and a Backup Contact Plan
Add two things to pre-visit messages: brief telehealth consent wording and a confirmed call-back number. The next reminder is the right place to handle both.
Use Brief Telehealth Consent Wording
Consent language helps set expectations and cuts down on mix-ups. Complete telehealth consent during the visit and document it in the chart.
Keep the wording short:
Your upcoming appointment will be by secure video or phone. Your clinician will review telehealth and ask for your consent during the visit.
If you want even simpler wording, use this:
Your next visit will be by secure video. If video does not work, we will call the number on file.
Use SMS and email for logistics only. Don’t include medical details.
Confirm the Patient's Call-Back Number Before the Visit
After the message sets expectations, confirm the number your team will use if video fails. A checked call-back number can save the appointment when the video drops.
In the 24–48-hour reminder, ask: "Is this still the best number to reach you if we lose the video connection?" Use a mobile number that can take calls and texts. If the household shares phones, state whose phone will be used on the day of the appointment.
Pair that with a simple fallback plan:
If video fails, our team will call [XXX-XXX-XXXX] within a few minutes. If we still cannot connect, we may complete the visit by phone or reschedule.
Document the confirmed number in a standard EHR field the provider can see before the visit starts. Then staff can call right away if the video drops.
Write Clear Instructions and Standardize the Workflow
Use Plain Language Patients Can Read in Seconds
Once the timing and backup details are set, write the message so patients can act on it fast. A patient should know what to do in about 30 seconds. Keep it to one idea per sentence. Use active verbs. Skip jargon.
Short sentences help. So does a simple reading level.
For example:
- Charge your device.
- Connect to your home Wi‑Fi.
- Click the link 10 minutes early.
Give first-time users a longer version with a bit more guidance. For returning patients, use a shorter version.
Conclusion: The Message Elements That Matter Most
After you simplify the wording, load that same text into your EHR. Store the three templates in your EHR and add merge fields for the date, time, provider name, and visit link. This works especially well for telemedicine follow-ups.
Use three timed reminders, plain instructions, brief consent language, and a confirmed callback number.
FAQs
What should I do if the video link still doesn’t work?
First, make sure you’re using a supported, up-to-date browser. If it still doesn’t work, close and reopen the browser or clear your cache.
Also, check that your camera and microphone permissions are turned on for the appointment site. If the issue keeps happening, use the backup contact details in your pre-visit instructions - like the clinic’s phone number or patient portal - to reach our team right away.
Can a telemedicine visit continue by phone if video fails?
Yes. A telemedicine visit can usually continue by phone if the video connection fails.
To help avoid delays or cancellations, include backup phone contact details in pre-visit messages, ask patients to keep a phone nearby, and share a direct office or support number. Putting this plan in writing from the start helps the visit move forward with less friction and supports continuity of care.
How can I make pre-visit messages easier for patients to follow?
Keep setup guidance short, clear, and easy to follow so patients can check their device before the appointment.
Use simple language for device and browser needs. Skip jargon. A patient should be able to read the instructions and test their setup in a few minutes.
It also helps to share step-by-step handouts through your patient portal. That gives patients one clear place to find what they need before the visit.
Include backup contact details and your office information in every handout. If something goes wrong, patients should know exactly who to call, where to message, and how to reach your office without having to hunt for it.